REVIEW · BUDAPEST
Street photography with your smartphone, tour of Budapest
Book on GetYourGuide →Operated by Luigi Cantel · Bookable on GetYourGuide
Budapest gets better when your phone learns. This 1-day smartphone photo walk led by Luigi mixes street shooting practice with drone images so you come away with more than just sightseeing.
I especially like the hands-on approach: you’re shown exactly how to frame shots and why the angle works. And I like the added twist of having a professional capture you with a drone, then letting you watch footage of yourself near the main sights.
One possible drawback: it’s a photo-focused route with a set rhythm, so if you want long sit-down stops or ticketed museum time, you’ll need to plan that separately.
You’ll meet at Fővám tér 5 (in front of Starbucks) and follow a pre-established route with time set for each photo stop. I also appreciate that small groups are preferred, but solo travelers are welcome too. And because it ends with editing help, you’re not just taking pictures and hoping for the best.
In This Review
- Key things you’ll get from this Budapest street photo tour
- Why this Budapest smartphone photo walk feels different
- Getting oriented at Fővám tér 5 (and setting yourself up to shoot)
- Liberty Bridge photo stop: make lines do the work
- Central Market Hall: shoot the energy without getting lost
- Kalvin Square: urban textures and quick decision-making
- Subway / metro segment: practice with darker scenes
- Bikás Park: a quieter contrast after the city core
- Drone photos and footage: the fun souvenir you can’t fake
- Editing with free Lightroom: turn good frames into standout photos
- Price and value: what $16 buys in one day
- Who this Budapest street photo tour is best for
- Should you book this Budapest smartphone photo tour?
- FAQ
- Where is the meeting point for the Budapest street photography tour?
- How long is the tour?
- How much does it cost?
- Is the tour wheelchair accessible?
- Is this tour private or shared with other people?
- Do I get photos from the tour?
- Are drone photos and footage included?
- Is there a stop at the subway or metro?
- Are entry tickets to landmarks included?
- What are the cancellation and reserve/pay later options?
Key things you’ll get from this Budapest street photo tour
- Luigi’s shot-by-shot coaching so your phone stops guessing and starts producing
- A route built around photo stops (Liberty Bridge, Central Market Hall, Kalvin Square, more)
- Time for practice at each location, not just quick photos and onward
- Drone photos and footage that show your journey from above
- Free Lightroom editing tips so you can improve what you shoot afterward
- Non-touristy angles mixed into the walk, not only the usual postcard spots
Why this Budapest smartphone photo walk feels different
Most Budapest photo tours teach you where to stand. This one helps you learn how to see.
Luigi runs it like a working photo session: you’re walking through real streets, stopping for specific scenes, and getting guidance on what to change on your phone to make the image look intentional. It’s street photography, not a lecture.
Then there’s the part that’s hard to beat for fun value: the professional uses a drone to snap photos of you during the experience. Later, you get to “marvel” at drone footage of yourself moving through Budapest and seeing the main sights from that overhead perspective. It’s the kind of souvenir that feels modern, not generic.
If your goal is practical skill—how to use your smartphone camera for light, composition, and timing—this tour makes sense. If your goal is to do nothing but browse landmarks at your own pace, it may feel structured.
You can also read our reviews of more tours and experiences in Budapest


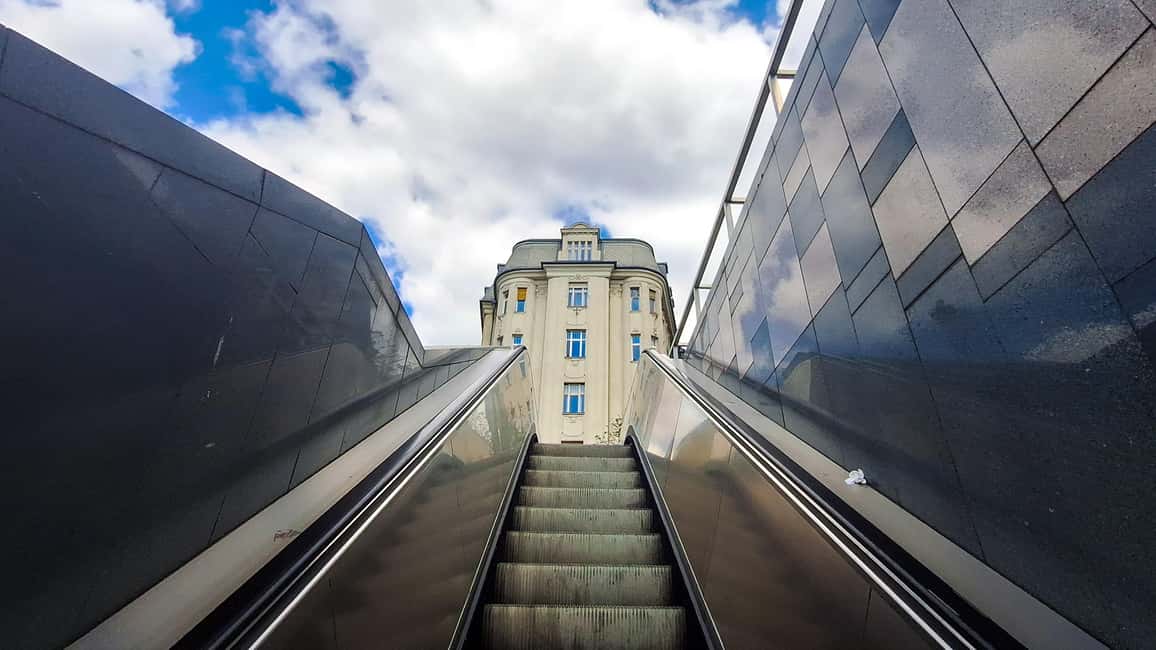
Getting oriented at Fővám tér 5 (and setting yourself up to shoot)

You start at Fővám tér 5, right in front of Starbucks. This matters more than it seems. A good meeting point gets you focused fast, so you’re ready to shoot before you’re distracted by travel logistics.
Because the tour starts at a time you can agree on based on weather, you’ll likely be planning around the real light of the day. That’s smart. Street photography lives or dies on light quality—soft clouds help, harsh sun demands technique, and rainy weather changes everything.
Luigi’s first job is to bring your phone into the right mindset. Even if you already know the basics, you’ll probably pick up small habits that save you from the most common smartphone mistakes: accidental blur, muddy contrast, and “everything is in focus” photos that don’t guide the eye.
Practical tip you can use right away: when you’re about to take a shot, pause for half a second. Decide what your photo is about. Then frame so your subject has room to breathe.
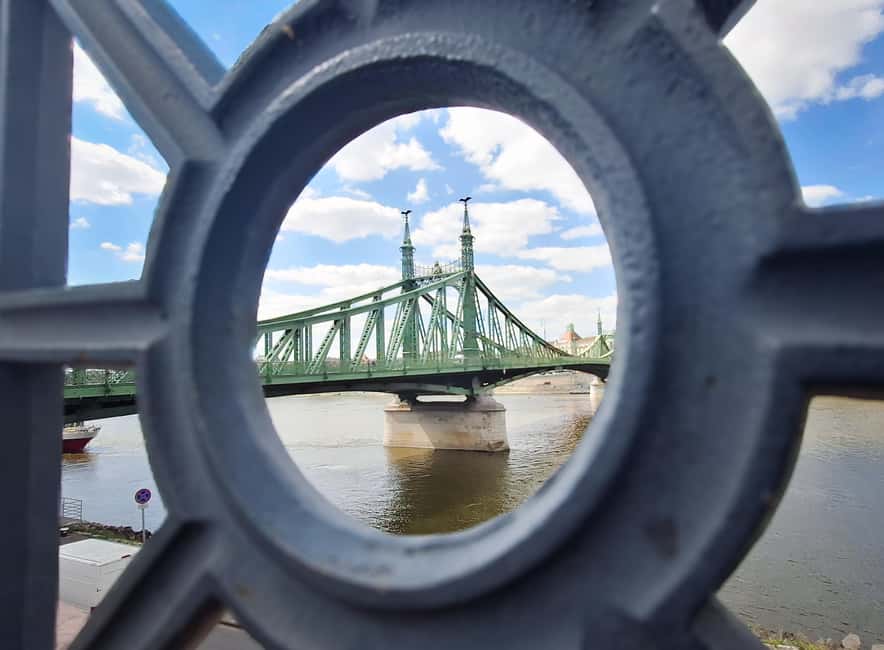
Liberty Bridge photo stop: make lines do the work
You’ll spend about 20 minutes at Liberty Bridge. This stop is a classic for a reason: it gives you strong shapes and lots of perspective options. Bridges are great training wheels for composition because you can use symmetry, leading lines, and repeated patterns to pull the viewer in.
Luigi’s coaching here is likely less about “take a photo of the bridge” and more about “choose the viewpoint that tells a story.” That could mean getting lower for scale, choosing a tighter crop to reduce clutter, or timing your shot so pedestrians and reflections cooperate.
The best part of this stop is the chance to practice a few variations. With only a quick photo, you never learn what changed the outcome. With a focused window, you can test settings and angles like a mini workshop.
Possible consideration: if it’s crowded, you’ll want patience. Street photography is half timing and half willingness to wait for your frame to clear.
Central Market Hall: shoot the energy without getting lost
Next up is Central Market Hall with another 20-minute photo stop. This area is visually busy—good news for photos, but tricky news for beginners. When scenes have lots going on, your biggest enemy is a picture that looks like a snapshot of chaos.
Luigi’s value is turning that chaos into a composition. You’ll likely get prompts on how to isolate details, use contrast, and choose angles that don’t force the viewer to work too hard.
Also, there’s a real-world planning issue here. Entry tickets to landmarks aren’t included, so if you want to go inside, plan for that separately. For the photo tour experience, the useful move is to treat this as a photography stop rather than a full market visit. You’ll get to practice seeing the hall as a backdrop, not only as a place to shop.
If you’re shopping for souvenirs afterward, great. Just don’t try to do both at max intensity. Your camera (and your feet) will thank you for staying in “shooting mode” during the photo window.
Kalvin Square: urban textures and quick decision-making
At Kalvin Square, you get another 20-minute photo stop. Squares are excellent for street photography because they mix architecture, pedestrian flow, and signage. They also force you to move quickly—there’s rarely one perfect spot. You’ll learn how to scout, test, and commit.
This stop is where smartphone skills start to feel real. Instead of finding one postcard view, you’ll probably work through a few compositions: wider context shots to show the square, then tighter frames to highlight gestures or details.
Luigi’s guidance tends to focus on the “why” behind each decision. That’s what makes this tour useful after you leave Budapest. You’re not only copying someone else’s favorite angle—you’re learning a repeatable way to think about framing and light.
If you’re sensitive to crowds, this can be the most energetic moment of the day. But it’s also where good street photography happens. Keep your eyes open for negative space—brief moments where the scene clears and your subject stands out.
You can also read our reviews of more photography tours in Budapest


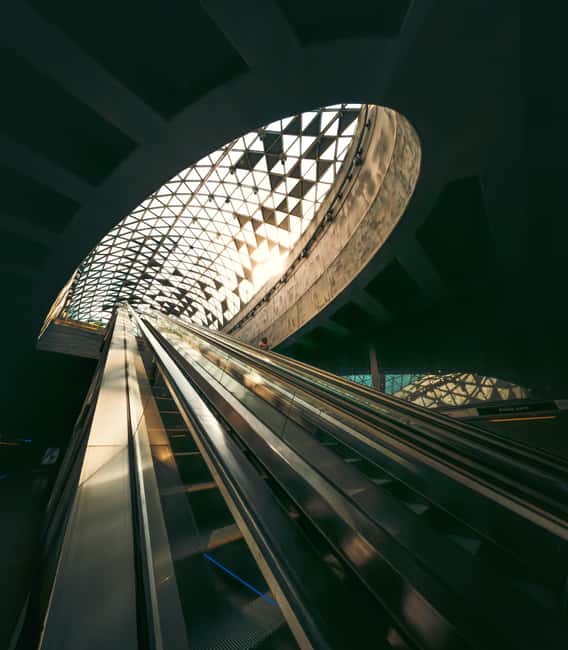
Subway / metro segment: practice with darker scenes
You’ll spend about 10 minutes on the subway/metro. Even if you don’t ride for long, this part helps you understand a major smartphone challenge: low light.
Underground scenes can push your phone toward blur or grainy noise. So this is where technique matters. You’ll be learning how to keep stability, how to frame so motion doesn’t destroy the image, and how to avoid photos that are too dim to be enjoyable later.
This stop is also useful because it changes the mood of your day. All the bright outdoor stops can make your photos look similar. A darker segment gives your set variety, which is what makes a photo collection feel intentional.
Practical expectation: you’ll likely keep moving. This isn’t a long transit hangout. It’s a short skill stretch.
Bikás Park: a quieter contrast after the city core
Then you head to Bikás Park for another 20 minutes. Parks are a smart contrast after denser urban scenes. They offer more forgiving backgrounds and chances to work with softer light, trees, paths, and open sky.
For street photography practice, parks let you slow down without fully giving up on “street” energy. You can focus on smaller details: your subject against a brighter background, leading lines in the path, or a careful crop that turns everyday elements into composition.
This is also one of the better places to experiment with portraits or semi-posed shots, because backgrounds tend to be cleaner and less chaotic than city centers. If you’ve been frustrated by distracting backgrounds so far, this is your chance to correct course.
Drone photos and footage: the fun souvenir you can’t fake
A highlight of the experience is that the professional will snap photos of you using a drone during the tour. That means you’re not stuck only behind the camera. You get a new angle on yourself in the city, which instantly makes the whole journey feel more personal.
Even better: you’ll get to marvel at drone footage of yourself seeing Budapest’s main sights. This is the kind of souvenir that feels different from a few standard skyline shots. It’s also practical for your memory. Seeing your day from above reminds you where you went, even if you forgot which street corner looked best at the time.
A quick consideration: drone work often depends on weather and conditions. Since the tour start time can be agreed based on weather, the day’s plan is likely built to help this part work smoothly.
Editing with free Lightroom: turn good frames into standout photos
At the end, Luigi shares photo editing tricks using the free Lightroom app. This is a big part of the value because editing is where many smartphone photos either become polished—or stay “almost.”
You’ll get the basic habit that matters most: edit selectively. Don’t try to transform every photo into a different world. Pick the best shots and improve what’s already working.
Without inventing details, here’s the general skill this kind of coaching usually emphasizes in smartphone workflow:
- fix framing with a crop so the subject reads instantly
- adjust exposure so highlights and shadows feel balanced
- tweak color and contrast carefully so skin tones and architecture look natural
Even if you only edit a few photos, the difference is huge. You’ll end up with a more cohesive set instead of a camera roll full of near misses.
And because you’ll have the photos on your smartphone by the end, you can start editing immediately while everything still feels fresh.
Price and value: what $16 buys in one day
At $16 per person for a 1-day experience, the pricing is refreshingly straightforward for what’s included: a guided photo walk with instruction, plus the drone photo and footage element, plus editing help with free Lightroom.
Two things drive the value here:
1) You’re paying for coaching. Smartphone cameras are easy to use badly. This tour helps you use them well.
2) You’re paying for outcomes. You don’t leave empty-handed. You’ll have photos saved to your phone and you’ll know how to improve them.
The one clear limitation: entry tickets to landmarks aren’t included. That’s normal for a photo-focused walk. If your plan is to do major interior visits, treat the tour as your “skills + photos” portion, and book separate time for any ticketed sites you want to explore inside.
If you want an organized day that turns into a usable photo set (not just memories), this price is hard to argue with.
Who this Budapest street photo tour is best for
This tour is a great fit if:
- you want to learn smartphone composition and practical camera habits, not just tour stops
- you like the idea of a local guide who knows where to stand and where to angle
- you enjoy shooting on foot and learning in the moment
- you want a fun modern souvenir thanks to drone photos and footage
It may be less ideal if you:
- hate walking or prefer long, unstructured museum time
- want a strict “see everything famous” itinerary with no coaching demands
- need lots of ticketed access during the day
The sweet spot is someone who wants better photos and a smarter Budapest route, and who doesn’t mind following a set sequence of stops.
Should you book this Budapest smartphone photo tour?
Yes—if you want to level up your smartphone photos in a way you can use right away. The mix of guided practice, drone moments, and Lightroom editing tips gives you both skill and results. For the price, the value feels unusually strong for a full-day photo experience.
Book it if you’re the type who likes to learn by doing: shoot, adjust, shoot again. Skip it only if you’re mainly looking for a relaxed sightseeing stroll with minimal direction. This tour is built for photography, and that focus is exactly what makes it work.
FAQ
Where is the meeting point for the Budapest street photography tour?
You meet at Fővám tér 5, in front of Starbucks.
How long is the tour?
The experience lasts 1 day.
How much does it cost?
The price is $16 per person.
Is the tour wheelchair accessible?
Yes, the tour is wheelchair accessible.
Is this tour private or shared with other people?
It’s listed as a private group. Small groups are preferred, and solo travelers can join.
Do I get photos from the tour?
Yes. At the end, you’ll have the photos on your smartphone, and you’ll also learn how to edit them if you want.
Are drone photos and footage included?
The experience includes a professional taking drone photos of your journey and providing drone footage showing you near Budapest’s main sights.
Is there a stop at the subway or metro?
Yes. There’s a subway/metro segment of about 10 minutes.
Are entry tickets to landmarks included?
No. Entry tickets to landmarks aren’t included.
What are the cancellation and reserve/pay later options?
You have free cancellation up to 24 hours in advance for a full refund, and there’s a reserve now & pay later option to keep your plans flexible.